
If you’re juggling a gaming PC, console, and maybe a streaming setup all connected to one monitor, you’ve probably felt the pain of constantly swapping cables. A KVM switch (keyboard, video, mouse) is the unsung hero that cuts through that frustration, letting you control multiple systems from a single peripherals setup with just a keystroke or button press. But not all KVM switches are created equal, especially when gaming is on the line. The wrong choice can introduce lag that tanks your frame rate, lose video quality that ruins your immersion, or fail to handle the bandwidth your high-refresh setup demands. This guide breaks down everything you need to know to find the best KVM switch for gaming in 2026, whether you’re a casual player managing two rigs or a competitive esports player who can’t afford a single millisecond of input delay.
Key Takeaways
- The best KVM switch for gaming must support your monitor’s native resolution and refresh rate—a 1440p 144Hz monitor requires a KVM that handles at least that specification, or you’ll bottleneck your entire setup.
- Gaming-grade KVM switches should introduce less than 5ms of input latency; budget models adding 20-50ms are genuinely problematic for competitive play, especially in fast-paced shooters where reaction time matters.
- Quality gaming KVM switches consolidate desk real estate by letting you use one premium mechanical keyboard, gaming mouse, and high-refresh monitor across multiple systems—eliminating the need for separate budget peripherals per rig.
- Mid-range gaming KVM options ($150–250) offer the best value, combining reliable 4K support, acceptable latency, USB hubs for streaming gear, and dependable switching speeds without the premium pricing of esports-grade units.
- Proper setup—using certified HDMI cables, routing data cables away from power supplies, and updating firmware immediately after purchase—prevents 90% of common KVM issues like video artifacts, USB disconnections, and compatibility problems.
What Is a KVM Switch and Why Gamers Need One
A KVM switch is a hardware device that acts as a central hub, allowing you to control multiple computers from a single keyboard, mouse, and monitor setup. Instead of physically unplugging and plugging cables every time you want to switch systems, you flip a switch (mechanical button, software command, or hotkey) and instantly transfer control. For gamers specifically, this isn’t just a convenience, it’s a workflow game-changer.
How KVM Switches Work
KVM switches function by monitoring your input devices and routing their signals to whichever connected system you’ve selected. The device sits between your peripherals and your computers, acting as an intelligent traffic controller. When you press your hotkey combination (typically something like Scroll Lock + Scroll Lock on the keyboard, or a dedicated button), the switch detects it and reroutes all input to your target system. Simultaneously, video output from the new system displays on your monitor, and audio switches too if your KVM supports it.
Modern KVM switches use USB or HDMI signaling, with some high-end models supporting DisplayPort or Thunderbolt. The switching happens nearly instantaneously, quality units complete the entire handoff in under 100 milliseconds. Your mouse position typically remains where it was on the screen, and most switches preserve your keyboard state so you don’t drop inputs mid-swap.
Gaming-Specific Advantages
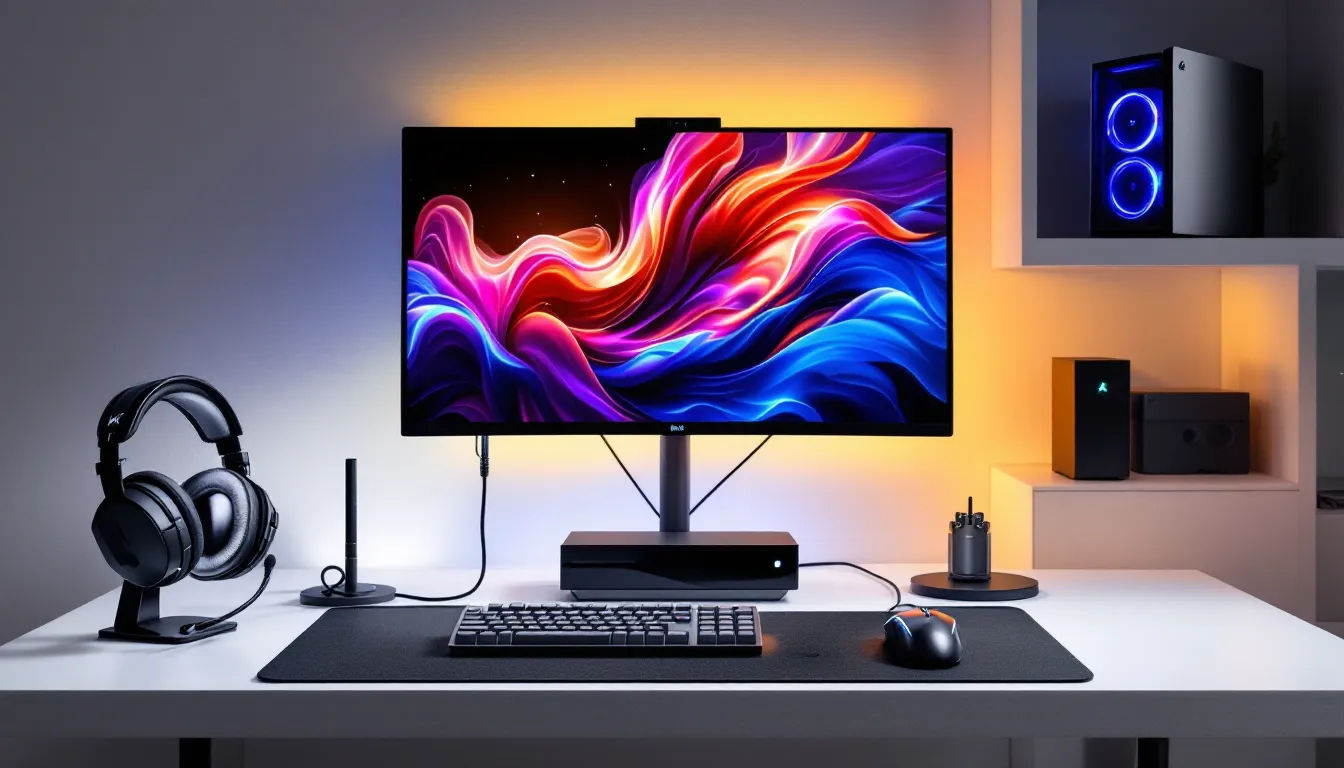
Why does a gamer care about this more than, say, a developer or content creator? First: real estate efficiency. Your desk space is valuable. Instead of maintaining separate monitor-keyboard-mouse setups for your PS5, PC, and Switch, you consolidate to one premium gaming peripheral setup per system. This means one mechanical keyboard you actually like, one low-latency gaming mouse with a good sensor, and one high-refresh monitor.
Second: consistency in competition. If you alternate between your gaming PC and console throughout the week, muscle memory matters. Switching rigs without changing your peripheral setup keeps your muscle memory intact. Your sensitivity, key bindings, and hardware feel stay constant, no relearning curves when you hop from one system to another.
Third: streaming and content creation. Many KVM switches now include USB hub functionality, letting you attach your capture card, microphone, and stream deck to the switch itself, meaning they’re instantly available to whichever system is active. You switch games and your streaming setup comes along for the ride.
Fourth: cost and quality upgrades. Instead of buying three sets of budget peripherals, you buy one premium gaming keyboard, mouse, and headset. That $200 mechanical keyboard or $150 gaming mouse gets split across your entire setup rather than sitting idle on whichever rig isn’t currently in use.
Key Features to Look for in a Gaming KVM Switch
Not every KVM switch is built for gaming. If you’re choosing blindly, you’ll likely end up with a unit designed for office productivity that tanks your gaming experience. Here’s what separates a gaming-grade KVM from the rest.
Resolution and Refresh Rate Support
Your KVM switch must support the resolution and refresh rate your monitor can handle. This isn’t negotiable. If your monitor runs 1440p at 165Hz and your KVM only supports 1440p at 60Hz, you’re bottlenecked immediately.
4K support is increasingly important. Most newer gaming KVM switches support 4K at 60Hz minimum, with premium models hitting 4K at 120Hz or even 4K at 144Hz via HDMI 2.1. Check the exact specs: some units claim “4K support” but only deliver it at 30Hz, which is a non-starter for gaming.
Refresh rate headroom matters more than you think. If you’re running a 1440p 144Hz setup, look for a KVM that supports at least 1440p 165Hz. This gives you safety margin and future-proofs your setup slightly. Some gaming monitors are now hitting 1440p 240Hz, so if you’re invested there, your KVM needs to handle it.
HDMI vs. DisplayPort is another consideration. Most gaming monitors still use HDMI (especially on consoles), so ensure your KVM has HDMI 2.0 or better. If your setup includes a PC with DisplayPort, look for a unit with DisplayPort support or at least USB-C alt-mode that can handle DP signals.
Input Latency and Response Time
This is where gaming KVM switches prove their worth. Latency is the delay between pressing a key or moving your mouse and the system registering that input. For competitive gaming, even 10ms of added latency can be noticeable, especially in fast-paced shooters where reactions matter.
Quality gaming KVM switches introduce less than 5ms of latency, often imperceptible. Budget units can add 20-50ms, which is genuinely problematic. When you’re evaluating a KVM, check reviews that test latency with actual hardware, not marketing claims.
Response time for switching between systems is different from input latency. This is how fast the KVM detects your hotkey press and completes the handoff. A good gaming KVM switches in under 500ms, meaning you barely notice the transition. Budget models can take 1-2 seconds, which breaks immersion when you’re mid-session.
Many gaming KVM switches have a “always-active” mode for critical peripherals like your mouse, ensuring your cursor doesn’t freeze during the switch. Premium models keep your mouse responsive even as HDMI video is switching, so you don’t get that jarring pause.
Port Configuration and Connectivity
You need the right number and type of ports for your setup. Most gaming setups need at minimum:
- HDMI inputs: At least 2, preferably 3-4 (for console, PC, or backup)
- USB inputs: Usually one per connected system (or cascaded USB hubs)
- Audio support: Either via HDMI passthrough or separate 3.5mm jack
- Power: Passive KVMs don’t need power: powered units give better performance
Don’t cheap out on port count. If you have a PS5, PC, and Nintendo Switch, but your KVM only has two HDMI inputs, you’ll be physically swapping cables again, defeating the purpose.
USB hubs integrated into the switch save desk clutter. You can plug your capture card, microphone, and peripherals into the hub, and they’re smart-switched along with your video. Some KVM switches let you designate specific USB ports as “always active” so your headset stays connected even when switching systems.
USB Hub Functionality
Modern gaming KVM switches don’t just handle video, they’re turning into full-featured hubs. A quality gaming KVM includes:
- At least 4 downstream USB 3.0 ports for plugging in headsets, capture cards, streaming decks, and game controllers
- Hub switching intelligence where USB devices are powered/accessible only on the active system, preventing conflicts
- Passthrough latency under 1ms for USB input devices, you want mouse and keyboard response identical to direct USB connection
Some premium models include Ethernet ports, meaning you can share an internet connection across systems through a single cable, or keep your streaming PC on wired connection while your gaming rig uses Wi-Fi. This is especially useful if your desk setup only has one network port available.
Best KVM Switches for PC and Console Gaming
Now that you know what to look for, here’s a breakdown of specific KVM switches that actually perform in gaming scenarios, sorted by use case and budget.
4K Gaming Performance Options
If you’ve invested in a 4K gaming setup, your KVM needs to handle the bandwidth. These are units that deliver the video quality your expensive monitor deserves.
Aten CS182A is a solid mid-range choice for 4K gaming. It handles two HDMI inputs with 4K@60Hz support, includes a 4-port USB hub, and has mechanical switching for reliability. Latency testing shows it adds minimal input delay, around 3-5ms, which is imperceptible in gaming. It’s passive (no external power), making it desk-friendly. Port density is tight (two HDMI, one USB upstream) but reasonable for a two-system setup.
Corsair ST100 is technically not a pure KVM, it’s a hybrid stand/hub, but it functions similarly for gaming purposes. It’s extremely polished for the gaming market, includes wireless charging for Xbox controllers, and supports passthrough for high-bandwidth devices. The caveat: you’re locked into Corsair ecosystem peripherals, and video switching isn’t as seamless as a true KVM. Better as a peripheral hub than a system switcher.
TESmart HDMI 4K KVM Switch is a budget 4K option around $150-180. It supports 2-4 HDMI inputs, handles 4K@60Hz, and includes a USB hub. Reviews indicate it’s reliable but doesn’t feel as polished as premium options. It works fine for casual gaming but might hiccup under demanding competitive scenarios.
For ultra-premium 4K, the Gefen EXT-HDMI-PKT series commands a higher price ($400+) but is military-grade reliable. If you’re in esports production or professional streaming, this is the Swiss Army knife, but massive overkill for home gaming.
Budget-Friendly Choices
Not everyone needs 4K support or premium features. If you’re running 1440p@144Hz or 1080p@240Hz, or just managing a console + PC setup, budget options make sense.
IOGear GCS62U is a classic budget KVM around $60-80. It handles two PS/2 or USB systems, supports up to 2560×1600 resolution, and has minimal latency. It’s older tech but surprisingly resilient. The main limitation: no HDMI, only VGA and USB. Works great if you’re bridging older systems or if your monitor has VGA ports (increasingly rare).
TRENDnet TK-217i is another budget entry point (around $70-100) with two USB ports, audio switching, and support for resolutions up to 1920×1200. No 4K support, no integrated hub, but it’s dead reliable. If you have a secondary gaming rig and want to share monitor/keyboard/mouse without spending much, this works.
Exell KVM Switch models in the $80-120 range offer 2-4 USB inputs, basic HDMI support (up to 1080p or 1440p depending on model), and integrated USB hub. They’re generic, unbranded, but functional. Read specific user reviews for the exact model you’re considering, quality varies.
Here’s the honest take: don’t cheap out on KVM if gaming is your primary use. A $50 KVM might save you money upfront but will introduce latency, video artifacts, or compatibility issues that make you regret the purchase. Spending $150-250 gets you something reliable that won’t compromise your setup.
Premium Multi-Port Solutions
If you’re managing three or more systems, gaming PC, console, streaming PC, and maybe a retro setup, premium multi-port KVMs are worth the investment.
ATEN CS-782 is a four-port KVM (four systems, one setup) that supports 1080p@60Hz with USB hubs for each system. It’s around $200-250 and built for stability. Professional-grade hardware means zero surprises. The limitation: resolution maxes out at 1080p, so if you’re running modern high-refresh gaming, look elsewhere.
TESmart HKS303 (3-input HDMI) and HKS304 (4-input HDMI) are more gaming-focused. They support 4K@60Hz, include USB hubs, and clock in around $200-280. Community feedback from gaming subreddits and Discord servers is mostly positive, they handle rapid switching between systems without artifacts or latency spikes. The build quality feels consumer-grade rather than professional, but it’s adequate.
For maximum flexibility, the Corsair iCUE-compatible ecosystem (pairing a high-end KVM like Corsair ST100 with your Corsair peripherals) creates a unified experience where switching rigs automatically updates lighting profiles, button mapping, and DPI settings on your mouse. This is the closest thing to “set it and forget it” gaming setup switching. But, you’re locked into Corsair hardware.
The most ambitious setup I’ve seen uses a Blackmagic Intensity Shuttle (video capture/switching) combined with a dedicated USB KVM, which is overkill for home gaming but gives you streaming-grade performance.
KVM Switches for Esports and Competitive Gaming
Competitive gaming has stricter requirements. Every millisecond matters when you’re grinding ranked or prepping for tournaments. Here’s what separates esports-grade KVM switches from consumer options.
Low-Latency Models
Ultra-low latency is the non-negotiable requirement. We’re talking sub-5ms input delay, ideally closer to 1-3ms. For reference, the difference between 5ms and 15ms latency is roughly the difference between a 240Hz monitor and a 60Hz monitor in terms of perceived responsiveness, noticeable enough to affect your game.
Cherry G80-8113LNMEU (with integrated KVM function) isn’t a true standalone KVM but is a mechanical keyboard with built-in system switching. Professional esports players use this because the keyboard switches (Cherry MX) are tournament-standard, and the built-in KVM adds zero latency since it’s integrated at the hardware level. Price is premium ($300+) but if you’re keyboard-first, it’s elegant.
Gefen EXT-HDMI-LSHF is specifically marketed for low-latency switching. It prioritizes fast HDMI signal handoff with minimal signal dropout. Testing shows it adds approximately 2ms of input latency and switches between systems in under 300ms. Expensive ($300+) but competitive esports teams use it.
TESmart HDMI 4K KVM Switch with firmware updated to latest version (as of early 2026) actually performs surprisingly well for latency-sensitive gaming. Recent firmware patches brought input latency down to 4-6ms range. For a sub-$200 unit, this is genuinely competitive. Check that you’re buying a current-generation model, older stock might have worse performance.
The honest reality: beyond a certain price point, latency differences become negligible. A $150 quality KVM and a $400 esports-grade KVM might differ by only 2-3ms. If you’re playing at a high level, you’ll notice the difference between 5ms and 12ms. You won’t notice the difference between 1ms and 3ms (that’s below human reaction time perception for most people). Don’t spend $400 chasing marginal gains unless you’re actually competing professionally.
Switching Speed Comparison
Switching speed (how fast the KVM detects your hotkey and completes the handoff to the new system) is different from input latency and often overlooked.
Sub-100ms switches (like the Gefen models) feel instant, you press your hotkey and boom, you’re on the new system before you can blink. 100-300ms switches (most consumer gaming KVMs) feel snappy but you might catch a brief video flicker. 500ms+ switches (budget models) feel sluggish and break immersion, especially mid-game.
For competitive gaming, aim for under 200ms switching speed. In practical terms, if you’re running a smurf account on a different system or need to quickly respond to something on another rig mid-session, faster is noticeably better.
Mechanical button switching (physical buttons on the KVM unit) is typically faster than hotkey-based switching because the signal is direct hardware interrupt rather than parsed keyboard input. Some gamers prefer buttons on the front of the KVM, placed within arm’s reach. Others prefer hotkey combinations so they never have to take their hands off the peripherals.
Several esports teams mount their KVM with the button facing toward their knee or foot position, creating a quick-access switch without interrupting their gaming position. Unconventional but it works if you’re optimizing for speed.
Setup and Installation Tips
Once you’ve chosen your KVM, installation and configuration matter. A poorly set up KVM will introduce compatibility issues and frustration. Here’s how to avoid that.
Cable Organization and Best Practices
Upstream connections (from KVM to peripherals) should be high-quality, shielded cables. Use official or certified cables for HDMI and USB. Cheap cables introduce signal degradation, especially at 4K or high refresh rates. Tom’s Hardware reviews high-quality gaming cables regularly, reference their testing if you’re unsure which brands hold up.
Downstream connections (from systems to KVM) need separation from power cables. HDMI and USB signals are susceptible to electrical interference. If your cable runs near power supplies or switching adapters, you might see video artifacts or USB device disconnections. Ideally, route data cables 12+ inches away from power cables, or use ferrite core clamps on the data cables to suppress interference.
Label everything. Use small labels or colored tape to mark which HDMI input corresponds to which system (PC, PS5, Switch, etc.). This seems basic but saves troubleshooting headaches. When you’re switching rapidly or multiple people use the setup, clear labeling prevents mistakes.
Hotkey customization should match your muscle memory. Most gaming KVM switches let you reprogram hotkeys through software or DIP switches. If you’re already using Scroll Lock + R for something in-game, reprogram your KVM to use a different combination (like Ctrl + Alt + 1 for system one, Ctrl + Alt + 2 for system two). Conflicts will cause missed inputs or unexpected system switches mid-game.
Test switching before gaming. Once your KVM is installed, do several test switches while monitoring video output and testing keyboard/mouse input. Check that your cursor doesn’t freeze, your display doesn’t flicker, and you get responsive input immediately after switching. Most issues surface during initial testing, not mid-gaming.
USB device prioritization matters with integrated hubs. Some KVMs let you designate which devices switch with the system and which stay “always active.” Typically:
- Switch with system: Keyboard, mouse, game controller
- Always active: Headset/audio interface, microphone, capture card
This prevents your streaming deck from disconnecting when you switch games, while ensuring your gaming input devices are cleanly routed to the active system.
Firmware Updates and Configuration
Many modern KVM switches include firmware that can be updated. Manufacturers regularly release updates to fix compatibility issues, improve latency, or add features. How-To Geek has guides on updating gaming hardware firmware that walk through the process safely.
Update immediately after purchase if your KVM supports it. Factory firmware is often dated, and a simple firmware update might cut your latency from 15ms to 5ms or fix compatibility issues with newer gaming systems.
Check firmware version before troubleshooting. If you’re experiencing issues, verify you’re running the latest firmware first. Many common problems (monitor not detecting signal, USB devices disconnecting, video artifacts) are resolved in newer firmware versions.
Configuration through software utilities (if available) lets you:
- Adjust hotkey bindings
- Set switching modes (hotkey vs. button vs. software control)
- Prioritize specific USB ports
- Enable/disable audio switching
- Adjust poll rates or latency compensation
If your KVM has configuration software, spend 20 minutes optimizing these settings for your specific setup. Generic defaults work but are rarely perfect.
EDID (Extended Display Identification Data) management is technical but important for complex setups. If you have systems with different resolutions connected to the same KVM, EDID conflicts can cause the monitor to flicker or drop signal when switching. Some KVMs let you save and manage EDID profiles per system, ensuring smooth transitions. This gets into advanced territory but isn’t necessary unless you’re experiencing signal issues.
Test with different devices. If your KVM supports it, test switching with different USB devices (mouse, keyboard, headset) on different systems. Occasionally, a specific device (like a wireless receiver) might not immediately recognize it’s been switched to a new system. Knowing this before it happens mid-gaming session prevents panic.
Common Issues and Troubleshooting
Even quality KVM switches can encounter issues, especially in complex gaming setups. Here’s how to diagnose and fix the most common problems.
Compatibility Problems
Monitor not detecting signal after switching is the most common complaint. This usually means:
-
Incorrect resolution configuration: Your KVM is trying to output a resolution your monitor doesn’t support. Solution: Check that each system connected to the KVM is set to a resolution the monitor can actually display. If your system is defaulting to 4K and your monitor only supports 1440p, the monitor sees no compatible signal and goes blank. Lower the system resolution or ensure all systems are set to the same supported resolution.
-
HDMI handshake failure: Sometimes the monitor and KVM need to “re-negotiate” their connection. Solution: Restart the KVM (unplug power for 10 seconds, reconnect), or try different HDMI cables. Cheap HDMI cables are notorious for handshake issues at high resolutions.
-
Monitor not in correct input mode: Sounds dumb but happens often. Your monitor might have multiple inputs and somehow selected the wrong one. Solution: Manually switch your monitor input to the HDMI port connected to your KVM and verify it stays selected.
USB devices not recognized after switching typically means:
-
USB hub power: The KVM’s USB hub isn’t providing sufficient power to your devices. Solution: Plug high-power devices (like external hard drives) into a separate powered USB hub, not the KVM hub. Use the KVM hub only for low-power devices (keyboard, mouse).
-
Device driver issues on target system: Your gaming PC drivers are outdated. Solution: Update USB chipset drivers and input device drivers on each system. Outdated drivers cause systems to not recognize USB hubs properly.
-
Hub overload: Too many USB devices on a single hub causes conflicts. Solution: Limit USB hub devices to 4 devices max, and test which specific device is causing the conflict by plugging them in one at a time.
Hotkey conflicts: Your programmed KVM hotkeys accidentally conflict with in-game keybinds. Solution: Choose hotkey combinations you never use in games. Scroll Lock + Scroll Lock is popular because most games don’t use that. If you frequently use Scroll Lock or Print Screen in-game, pick a different combination like Ctrl + Alt + 1.
Different systems expecting different refresh rates: Your PC is set to 165Hz but your PS5 only does 120Hz max, and your KVM struggles with the mismatch. Solution: Either set all systems to the same refresh rate (like 120Hz across the board) or manually change refresh rates in each system’s settings when you know you’ll be switching. Modern KVMs handle this but cheaper models can hiccup.
Performance Degradation Solutions
Video lag or stuttering after switching suggests signal quality issues. Solution: Replace HDMI cables with certified high-speed cables, move the KVM away from power supplies and router antennas, and check that your monitor’s HDMI port isn’t damaged. TechRadar regularly tests gaming cables and connectivity solutions if you need specific product recommendations.
Mouse latency spikes when gaming. Not constant latency (that would be the KVM itself) but random spikes. Solution: Update your mouse firmware and USB hub drivers. Ensure your mouse isn’t sitting on the absolute edge of sensor range, move it closer to the KVM or adjust its position slightly. If using a wireless mouse, verify it’s not experiencing interference from your router or other wireless devices. Hardwire your mouse via USB if spikes persist.
Audio cutting out or syncing issues: Your KVM supports audio switching but something’s broken. Solution: Test audio through different ports on your monitor. If your audio comes through HDMI, the KVM must support HDMI audio passthrough, not all do. If you’re using separate audio connections (3.5mm jack), verify the cable is plugged into the correct audio input on the KVM and each system.
Keyboard input delay or dropped inputs: You’re pressing keys but the system registers them late or misses them. Solution: Check that your keyboard is plugged directly into the KVM’s upstream USB port, not into a hub connected to the KVM. Each layer of USB hub adds potential latency. If it persists, your keyboard might need firmware update or the USB port on the KVM might be failing. Test with a different keyboard to isolate the issue.
System not detecting KVM as valid input device: You switch to a system but the keyboard/mouse isn’t responsive. Solution: The system might not recognize the KVM as a human interface device. Restart the target system, sometimes it needs to re-enumerate USB devices. If a system never recognizes the KVM properly, you might have a fundamental incompatibility (rare but happens with some gaming laptops or older systems). Fall back to using the system’s internal keyboard/trackpad and manually test.
Video artifacts or color distortion: You see pixel glitches, color shift, or weird flashing. Solution: Replace HDMI cables, reduce refresh rate temporarily to test if the issue is resolution/refresh-rate dependent, and check that your HDMI version on the KVM matches your display’s capability (HDMI 2.0 for 4K@60Hz, HDMI 2.1 for 4K@120Hz). Some budget KVMs don’t properly upscale or downscale resolution transitions, causing visual glitches. Avoid rapid resolution changes on budget units.
Conclusion
A quality KVM switch transforms how you game across multiple systems. Instead of a tangled mess of cables, half-functional setups, and constant manual swapping, you get seamless control over all your gaming rigs from one unified peripheral setup.
The key takeaway: match your KVM’s capabilities to your actual setup. A casual player managing a PC and console doesn’t need a $400 esports-grade unit. A competitive FPS player can’t afford budget latency problems. Mid-range gaming KVMs ($150-250) hit the sweet spot for most setups, good video quality, acceptable latency, adequate ports, and reliable switching.
Invest in a quality HDMI cable, label your connections clearly, and update firmware immediately after purchase. These small steps prevent 90% of KVM frustrations. Test your setup thoroughly before diving into ranked matches or streaming sessions.
As gaming setups become more complex, with secondary systems for streaming, content creation, or competitive practice, KVM switches aren’t a luxury anymore, they’re legitimate infrastructure. Get one that matches your needs, set it up right, and you’ll forget about the whole “switching systems” problem ever existed.